
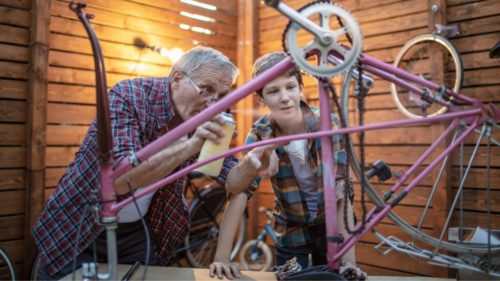
Bikes straight from the manufacturer can look pretty basic for the most part. Every company has its own color schemes, and they do that for instant recognition. However, some people want to make their own, and one of the best ways to do that is to paint their bike and get a custom look.
No matter what type of bike a person has, there are ways to give it a brand new paint job. Very artistic people can make something look better than anything off the shelf, while others want to show their creativity and come up with something unique. Creative minds love customizing anything they own, and a bike is a pretty easy canvas overall to work with.
What are the steps to painting a new bike and making it one of a kind? This is a look at the process, as many will try to develop something that truly stands out.
Click Here to match the PERFECT paint color for your bike!
1. Practice Runs
The last thing anyone should be doing is painting a bike without practicing at least a little bit at first. Bikes are expensive, and even though they are easy to paint over, again and again, no one should be trying to do something crazy the very first time on a brand new bike.
The best way to practice is to find some type of cheap frame either around the home or from a bike shop. There are some easy ways to access bikes that are very cheap, or even free, with some effort.
It is worth a little bit of an investment to have a canvas to practice on so that things can come together better when it comes to the real painting.
If an actual bike is not something that can be obtained, try to find any type of metal tube that is pretty much the same. Paint is going to take pretty much the same on most metals that are somewhat like bikes, so keep that in mind.
Practice with a bunch of different colors to see how everything reacts. The color of the paint might not be the exact same as what it will look like on the bike, so it is better to learn about that now than to learn about it later.
There are other things that people will learn through practice runs that can be very beneficial later on. Maybe a person will notice that they need to have more protection around the home or better tools overall.
A trial run is going to reduce the nervousness that a person might feel because they are doing so much on the bike. There are so many people out there who would love to get the bike right the very first time, and this is the best way to go about it.
2. Proper Preparation
What people learn from messing around with some practice first is that there are a lot of intricacies to painting a bicycle. To get it looking just right, a person needs to follow the right plan as much as possible. That starts from the very beginning, as prep work is necessary to get a bike ready for paint in the first place.
Even if the bike is brand new, the first thing a person needs to do is clean the entire frame off with rubbing alcohol and a towel.
Ensure that it is a towel that will not leave any type of residue on the bike. It needs to be completely clean and ready to go so that the paint will go on evenly and stay in the right place.
Working with raw aluminum, steel, or carbon is going to provide the best overall look of a bike once a person is really starting.
If it is not raw, try to sand it a little bit so that the paint is going to stick where it should. Sandpaper should be just fine, and there needs to be a little bit of texture on the surface. Rubbing too hard is going to remove the material and compromise the bike just a little bit.
3. Finding the Right Paint
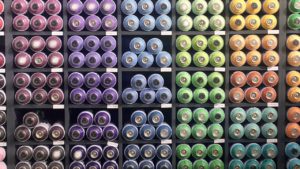
People can mess around with just about any paint, but when it comes to actually getting down to business, something that is high-quality and durable is the best way to go.
Make sure that the paint has a great reputation, and read some reviews online to see what other people are using. Remember that there are some paints that might be made for specific materials, so understand what the bike frame is made of before investing.
Most of the time, people are going to buy their paint either from the local art store, or online from a reputable dealer.
If the paint is coming out of a can, try to find a low-pressure option. If the paint comes out very slowly, it will be much easier to work with for beginners. Even seasoned veterans like the way that they can steadily apply everything with very low pressure with these cans.
Once a person decides to go with a certain type of paint, they should stick with that brand around the entire bike. This is because different brands use different materials, and they might not mix exactly the way they should.
There are a few different high-quality paint companies out there, so pick one and stick with it. Any hopping around is likely going to set the bike painting experience up for some hurdles.
4. Tape is a Painter’s Best Friend
Painting an entire bike means that it needs the proper amount of coverage in the right areas. The thing is, not all areas need to be painted properly. Put painter’s tape over certain parts of the frame where components are attached and will make life a lot easier.
Some bikes are different, so do not be afraid to use painter’s tape in other areas as well. The key here is to get a versatile type of painter’s tape that can not only be used for protection where components go but also to help with clean lines and creating an overall design.
Painter’s tape is pretty straightforward to use, but the only caveat is making sure everything is dry underneath.
Otherwise, peeling off the painter’s tape could end up taking the paint underneath right off as well. All of a sudden, what is supposed to be convenient is actually a setback.
5. Keep a Workstation Organized
After getting all the supplies together for painting a bike, everything should be as organized as possible to make sure that the workstation stays ready to go.
There are a lot of people who might end up having a pretty messy workstation, and that can be frustrating, to say the least.
Not only are there items all over the place, but it can really drive a person nuts if they can’t find certain things when they are in the midst of painting.
Additional workstation tools include a clamp or a rope to suspend the frame in the air. It is much easier to paint when something is holding the bike instead of a person holding it in one hand. Some level of steadiness makes a big difference in how it all looks in the end.
Make sure that there is a drop cloth of some type to protect the rest of the workplace from paint getting all over the place.
Since a person is working with paint, they should have proper eyewear and protection on themselves as well so that their clothes do not get anything all over them.
Overall, a workplace for painting a bike is pretty clean overall. There are no tools that a person needs to have around, and a large amount of space is not necessary either.
Try to have an area that is pretty well ventilated so that there are no problems in that area. The paint fumes can certainly have an impact on some people, so staying away from any trouble in that regard is important.
Working in a really stuffy area might make people feel lightheaded or dizzy with all the paint.
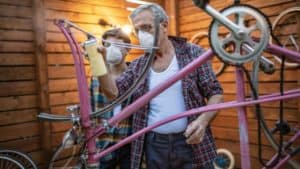
6. Spray Paint on Bigger Areas
Once it comes to actually painting, the first step is spraying the bigger areas with paint. Shake every new can for at least a few minutes to prepare it initially.
Do a few test sprays on to something else to make sure that a person understands exactly what type of consistency is coming out.
Once that is established, start spraying evenly on the bigger areas of the bike. Go for just a single coat at a time, and keep the hand moving while spraying.
It is perfectly fine to make stops when spraying, but try to do a great job of consistency overall. If it is a light spray in the beginning, it needs to be a light spray all around.
Apply the same pressure with the can all-around so that it looks great from the very first coat.
Spray paint is going to work best in drier weather conditions. It also is ideal to be in an area with a warmer temperature and relatively low humidity. If there is too much humidity, it can complicate the application process and slow things down overall.
Most people are going to paint more than just one coat, but it is important to let each coat dry completely before starting again. If the paint starts to spit a little bit during the painting process, make sure to shake the can from time to time during the process.
There could also be a chance that the paint is running a little low, so feel how much paint is left before starting a bigger section.
Patience is the biggest thing with spray paint in the bigger areas. It is easy for someone to think that they can rush through this process since it is usually just one solid color, but that is not the case.
The goal is to have something very consistent over the entire part of the bike, and then let it dry completely so that the true color comes out. After that, people can assess what they need to do with the next coat.
7. Detailed Painting
After the first coat, most people are going to focus more on detail-oriented painting to get everything looking just right. This is where a little bit more precision is needed, and some additional tools can help as well.
Depending on the amount of detail, people will want to use paint that they can control a little bit more. This means swapping out a can for more traditional paint and a brush, figuring out how to detail everything as much as possible.
Use painter’s tape as a great way to get details down as much as possible. Using a guide also helps, as people do not have to worry so much about messing up just once and ruining everything.
It can be very nerve-racking getting the details down, but there are always ways to start over the steps by putting another solid coat over everything.
The positioning of the bike frame when it is drying will make a difference when painting details. Simply put, use gravity to as an advantage instead of a disadvantage. Have the detailed part of the bike facing straight up, and there will be no running of different colors.
8. Finishing Touches
Some people will add a final layer of paint so that it stays as clean and consistent as possible. Others will leave it pretty raw, and while that is easier, it will probably not last as long as the bike is being used regularly.
The finishing touches for a bike is what will make it look like something that is professionally done, and maybe something that looks fairly customized. It all comes down to what look a person prefers more, and if they are willing to put in an extra bit of effort in the end.
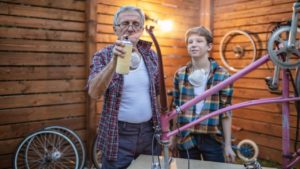
9. Don’t Be Afraid to Ask For Help
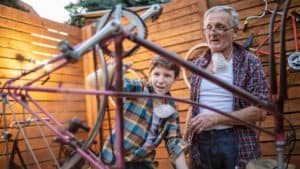
Giving paint a try initially is something that a lot of people will get satisfaction from. Painting is something a lot of people have quite a bit of passion for, but it might not always go exactly as planned.
Instead of being frustrated, the better thing to do is to ask for help when it is clear that it is needed. There are way too many people who feel like they are ashamed to ask for any type of help.
Why act this way when the ultimate goal is to have a great looking bike overall? It might cost a little bit more money to get it right, but there are plenty of people who still want to make sure they have the best look possible. Getting a few fixes can still leave a person feeling accomplished, even if they did not do 100% of the work.
There are a lot of local bike shops that will help out people if they have made any mistakes with their new paint job. Some will offer assistance in painting it the right color, while others will do a great job of clearing the slate as much as possible and preparing it for a new painting task.
Before trying the next time, try to pick the brains of people who have done it in the past. This can be done in person with people who might be creative, or doing research online.
There are a lot of different individuals who give tips on this type of stuff, and there are explanation videos out there for very specific types of painting as well.
Final Thoughts on DIY Bicycle Paint Job
It might seem intimidating at first, but painting a bike can be a very worthwhile experience. Not only do people get an opportunity to really explore what they are capable of doing, but it makes for a nice activity for individuals or even a family to take part in.
Remember that although there are ways to cut down on the chances of mistakes, they do happen from time to time.
No one should feel like they have to be absolutely perfect, especially if they are painting a bike for the first time. Take some proper precautions, and fixes will be pretty easy to do overall.
2 thoughts on “Painting A Bicycle The Right Way: Step by Step”