In order for everyone to have enjoyment on the trails, proper riding etiquette is essential. One thing that most people learn early on is how to make a simple fix on a groomed trail that you might have damaged.
Keep reading to learn all the important fat biking etiquettes while riding on snowy trails.
Use the tips below as a quick guide to ensure that there won’t be a ton of dirty looks picked up from other riders.
1. Fix Your Ruts
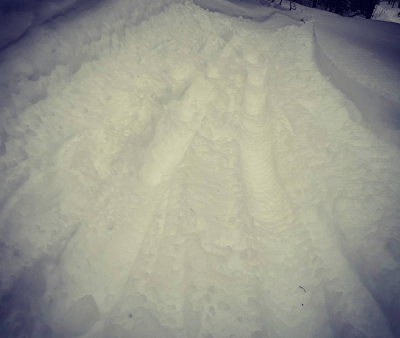
It might not seem like that big of a deal for someone who is just starting out, but one person can ruin the fat biking experience for all the others planning on using the trail if there is a rut left, make adjustments right away
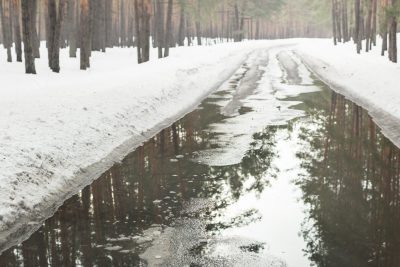
This is the biggest tip everyone should be following at all times. If it is a groomed fat bike trail, there should never be any ruts left for others to have to handle later on.
If it is extremely noticeable, a person should stop and try to fix the rut as much as possible. More importantly, turning around and making adjustments to ensure that ruts are not left everywhere is essential.
A rut could appear for several different reasons. A lot of times, a person is riding with tires that are not right for the conditions. Maybe the air pressure is too high, or the tires are too narrow (more on that below).
Just be aware, especially early on in a ride, and everything can be dealt with correctly. Never be that person who is ruining it for everyone else. If a fix seems impossible, unfortunately, the solution should be to pack up and find another trail or try again another day.
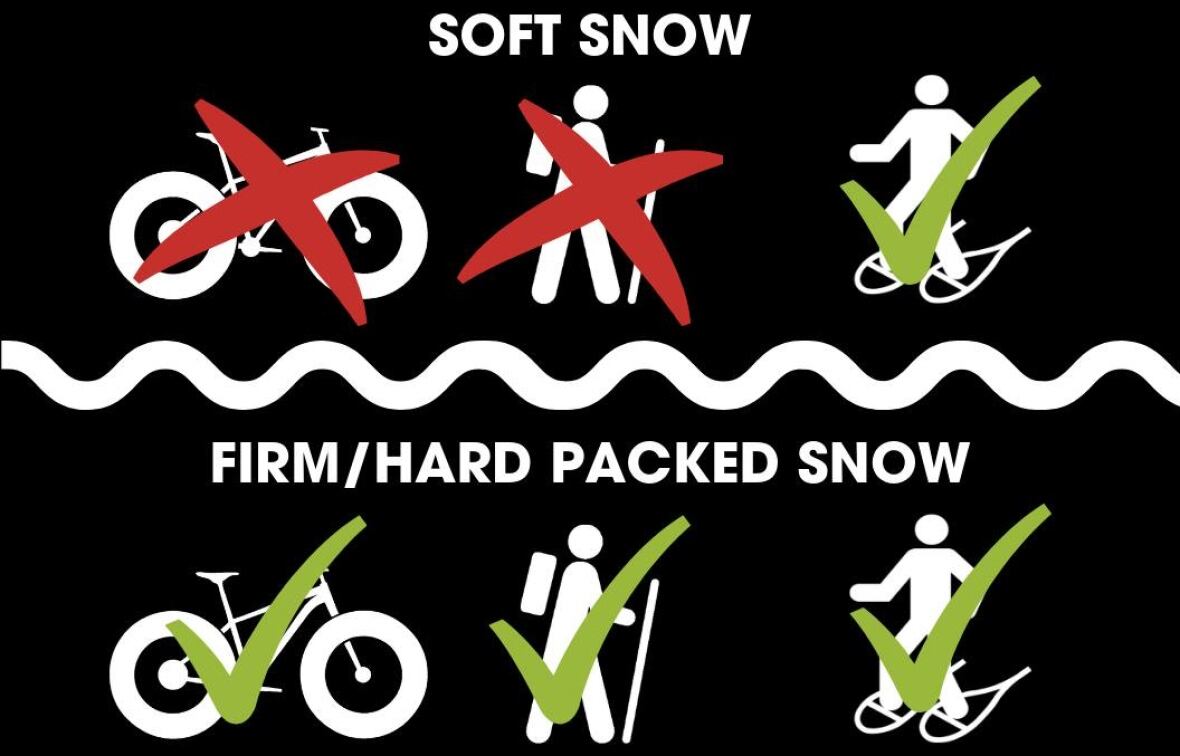
2. Fat Bike Trails Mean Fat Bike Tires

A wide tire is not only going to provide a better riding experience, but it is just better etiquette on the track to use them. It significantly reduces the chance of ruts appearing, and it smoothes out the ride for the rider.
The general consensus right now is to be right around 4 inches on tire width. A person can go slightly under if they are lightweight, but those on the heavier side should be going more towards 5” in width.
Remember, these are always rough estimates, but showing up with a plus-size tire just won’t cut it if the groomed trails are too soft.
3. Check Air Pressure Every Single Time Before a New Ride
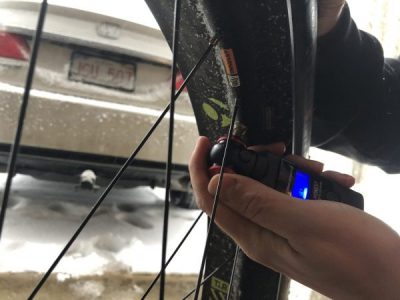
Every fat bike trail is a new adventure, and a new experience comes with different air pressure. The most common suggestion with air pressure is the softer the conditions, the lower the air pressure needs to be. This changes for how experienced the rider is, how heavy the set up in person is, and other factors.
As a good starting point for different types of fat bike trails, look at around 1 to 4 PSI for a very soft ground surface. If it is more of the harder side, jump up to 6 to 8 PSI. Remember, this is just a starting point, as everyone will ultimately go with what feels right to them.
Fat bike beginners are always a little worried about dropping so low in PSI. Most bike riders early in life learn to inflate tires and have them firm overall. That works on hard, smooth surfaces like the road. On a fat bike trail, low PSI provides a gliding experience, a smoothed outride, better control, and more.
4. Be Cautious of Weather Changes
Fat bike riding in the snow is a fun experience until the conditions change to the point that it becomes dangerous. One of the trickiest things is dealing with thawing conditions. That’s why a lot of riders will try to stay away from riding when the temperature rises.
While the warmest part of the day tends to be in the middle, changing weather patterns can make things tricky as well. Snow temperature usually takes a couple of hours to catch up with air temperature. That gives a rider a little bit of time to get off the trail if they feel things are warming up.
A big factor in how a trail reacts to the weather is looking at its surroundings. If the trail gets hit with a lot of sunlight, it is going to warm up a lot more quickly than one in a very wooded area.
If the conditions change, do as much as possible to get back to safety instead of trying to plow through a trail that isn’t ready.
5. If It Looks Too Freshly Groomed, Avoid Riding On It
A freshly groomed trail might look very enticing, but they need some time to prepare properly for a great ride. In particular, newly groomed trails need to harden up just a bit depending on the weather conditions.
Riding on it too quickly could increase the chances of leaving long ruts in the trail without even realizing it.
To make things worse, since the trail is hardening up, that rut will freeze in place for every rider that comes after.
6. Make Sure it is Indeed a Fat Bike Trail
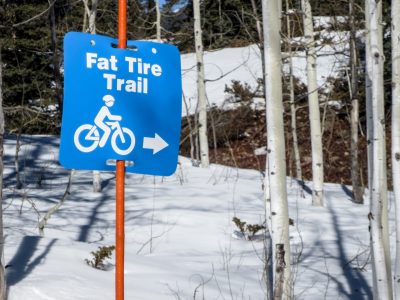
Not every trail caters to fat bike riders, even if it might look like one at first glance. There are still certain sections of the world where trails might be tailored for some other type of transportation, and riding a fat bike on it could mess up the trail or get in the way.
There should be a sign at the start of any trail, explaining what type of bikes or automobiles are allowed.
For example, if the trail design leans towards snowmobiles, a person could easily be in for a rude awakening when they see one coming fast from behind.
7. Respect Other Types of Trails
To go along with the tip above, don’t ride on a trail and be oblivious to everyone else who might use the trail.
One common complaint comes from people who are into cross country skiing since they are passed a lot by people who are using motorized vehicles, bikes and more.
Treat the trails like the roads. The last thing anyone should be doing is riding down the middle of the trail, preventing people from passing. It slows the trail down and could cause accident/injury.
8. Wear Proper Attire When Sharing Trails
When a trail identifies as a shared trail for several different uses, it becomes more critical for proper attire to be worn. For the most part, using light colors and reflective gear should always be part of the plan.
Always be as visible as possible on the trail. Have lights, reflectors, and more on the bike. During the winter months, it gets dark pretty early, so it can be hard to see others out there at times.
9. Donate to Your Fatbiking Grooming Association
Usually, there’s a nominal fee to use the fat bike and Mtb trails. Make sure to buy your membership because all the money earned goes into the building and maintenance of the trails.
Where I’m from the Mtb association builds and maintains trails year-round. Building trails in the summer for Mtb and grooming them in the winter for fatbiking.
The money earned for winter biking goes into buying, maintenance and gasoline for their snowmobile.
All of this would not be possible for the long term without donations and memberships, so be sure to support them where ever possible.
10. Take Care of the Groomers
And the final fat biking etiquette tip is to take care of your trail groomers.
From sending them a shoutout or messaging them on social media thanking them for their hard work to giving them a gift. All of this is much appreciated for their hard work.
One great gift idea is locally bought craft beer, who wouldn’t like a nice cold beer for their next ride?
Be sure to follow all of these fat biking etiquettes so everyone can enjoy the awesome fat bike trails the groomers build for us.
One thought on “10 Fat Bike Trail Etiquette Riding Tips”